Dark Souls Boss Guide

Beating Dark Souls is no easy feat for many gamers out there, and every player has at least one boss that they struggle with no matter how many times they beat it. Some players even get stuck, especially considering the original game made coop a nightmare. This is a guide designed to assist players with strategies for the different bosses of the game. Good luck, fellow Hollowed!
Dark Souls Main Area Bosses
These are the Bosses to beat the main game. Others are DLC, Mini-Bosses, and Optional Bosses.
Asylum Demon
The Asylum Demon is the first boss of the game. It is required to beat to leave the North Undead Asylum. There are two areas where you can beat the Demon. We recommend killing it during the second encounter. After you escape your cell, light the first bonfire, and you will then open a large set of doors that leads to the courtyard. Once you enter the courtyard, the Asylum Demon will leap down and attack, making this the first encounter. You can attack here if you choose, but, as previously stated, we recommend running to the next room so you have more equipment for the second encounter, making the fight easier. As you progress through the Asylum, you will find yourself on the second floor on a platform above the Demon. Now equipped with a weapon and shield, this is where you want to attack. Note that killing it the first encounter does give you Great Hammer.
Boss Stats:
Health: 825
New Game Plus: 1,100
Souls Dropped:
New Game: 2,000
New Game Plus: 10,000
Items Dropped:
1 Humanity
Big Pilgrims Key (Second Encounter)
Demons Great Hammer (First Encounter)
Asylum Demon Strategy:
The Asylum Demon is the easiest boss in the game but does have some hard attacks if you managed to get hit.
If you chose to fight in the second encounter make sure you lunge off the platform and attack, otherwise the Demon will destroy the platform if you wait too long. Doing so will deal a big chunk of his health, giving you a head start in the fight. Otherwise fighting him remains the same either encounter, aside from the fact you will have a good weapon in the second encounter. Stay close and almost behind the Demon, his attacks are slow so you can dodge accordingly. When he uses ground pound simply back away and dodge. If you chose the Master key as your starting gift or the Thief class, beating the Demon the first encounter. Another good way to beat it is using Black Firebombs.
Bell Gargoyle
The second required boss in the game is known as the Bell Gargoyle and he is located in the Undead Parish. There will be two of them wielding Halberds, and both of them able to breathe fire upon their enemies. This boss is nested on the roof of the Parish. They also block the way to an important merchant that will not follow you to the Firelink Shrine.
Boss Stats:
Health: 1,000
New Game Plus: 2,500
Souls Dropped:
New Game: 10,000
New Game Plus: 50,000
Items Dropped:
1 Twin Humanity
Gargoyles Halberd
Gargoyle Shield (Moderate Drop Rate)
Gargoyles Helm (Low Drop Rate)
Gargoyles Tail Axe (If you manage to chop off the tail)
Boss Attacks and Strategy:
*Note you can kill one and die or homeward bone and then kill the other to farm these items*
Fighting the first one it uses mainly his ax, and fire if you try to hide. Once halved the second one will appear with half health and mostly breaths fire.
*Note that Solaire is an optional summon for the fight if you have followed his story requirements. Knight Lautrec of Carim is another option to summon once rescued.*
The Gargoyles can be a nasty pair without help, so being able to summon makes the fight a lot easier. Otherwise, your goal is to fully assault the first one until the second one appears. Have a good shield at hand and try to keep them apart to pick them off. Use Firebombs or pyromancy if you are able to, and do not hide on the narrow paths on the opposite side of the entrance unless you want to die a fiery death. Dividing and conquering will be your best strategy here, and try your best to not let them near each other to gang you.

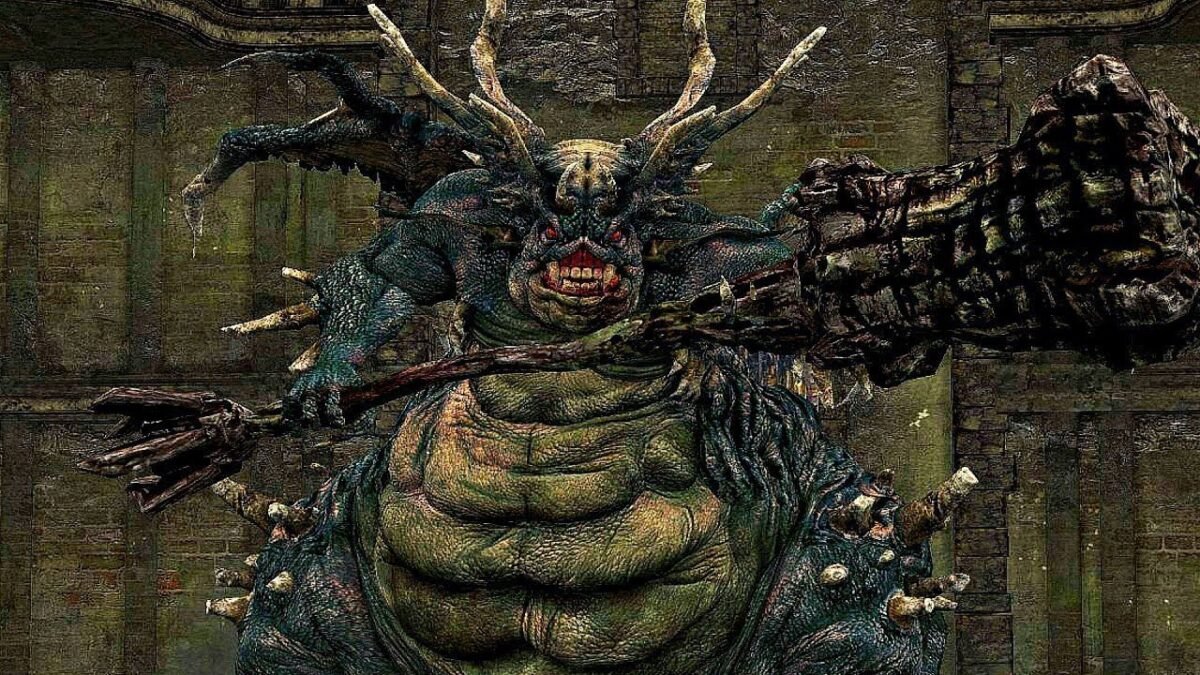
Chaos Witch Quelaag
Quelaag is a half-woman half-spider demon who resides below Blighttown in a cave. She is one of the daughters of the Witch of Izalith, and was changed by the Flames of Chaos. She is required to beat to gain access to the second Bell of Awakening and entrance to the Demon Ruins. She also is guarding access to the Chaos Covenant, is a bit more vicious than some of the other bosses, and can be a pain to deal with if not prepared.
Boss Stats:
Health: 3,139
New Game Plus: 6,027
Souls Dropped:
New Game: 20,000
New Game Plus: 60,000
Items Dropped:
Soul of Quelaag
Twin Humanities
Boss Strategy:
Quelaag has a variety of vicious attacks and an AOE. Most of them can knock you bad or kill you in a pool of Lava. The good thing is she always telegraphs her moves.
*Note you can summon Maneater Mildred*
Quelaag is a vicious opponent but does have some significant weaknesses. These are Lightning or projectiles (they cause her to stagger). Pyromancy will not help for she is immune to fire. It is important to try and stick to her sides and watch for her telegraphs. Once you enter her domain immediately move out of the way to not get pinned to the entrance. Try to wrack up damage by sticking to her sides and attacking her legs. Dodging her attack will need to be timed correctly. Try to bait her lava pools towards the sides of the room to make it easier to move freely. Wearing fire-resistant gear will go a long way in keeping you alive. Fire Sweat is a must-use for pyromancy users. Come with a bow if able to help stagger her during combat and prevent her from using her attacks. Attacking her upper body is the best method for staggering, so for those with no bow a great scythe is another weapon that can reach. Primarily the Great Scythe Weapon is actually an exploit and does not take much stamina to use.

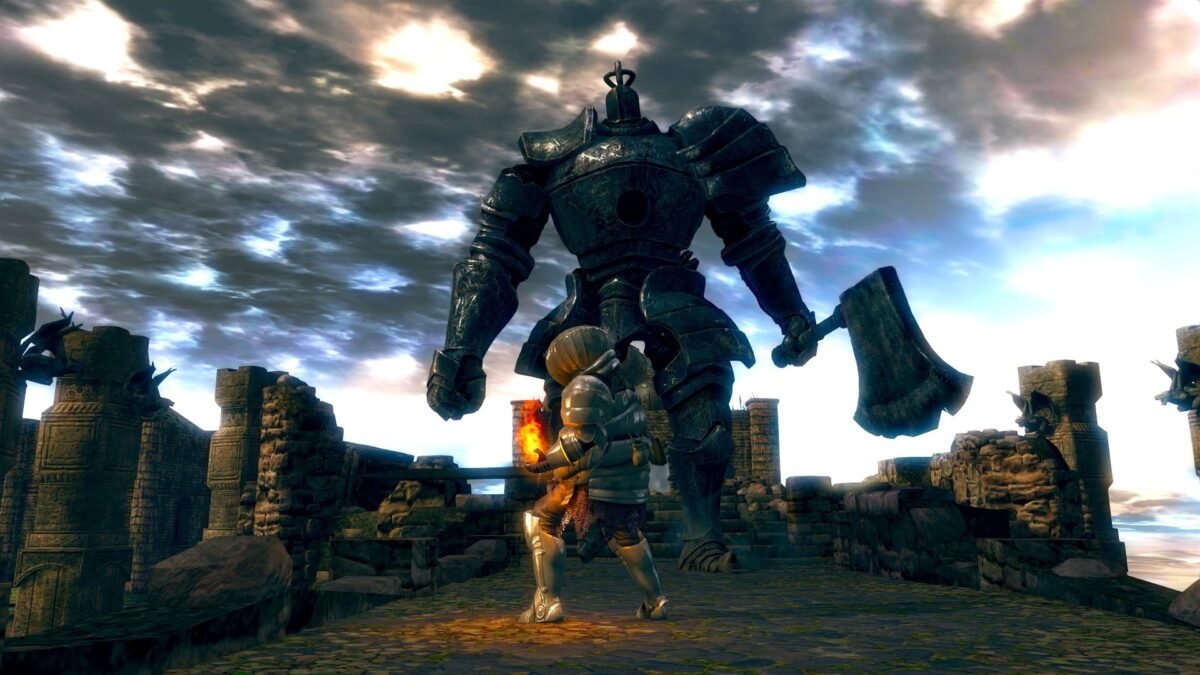
Iron Golem
The Iron Golem is the final fight in Sen’s Fortress and also blocks the way to Anor Londo.
*Notes to kill the Firebomb Giant prior to the fight or he will throw firebombs during the fight.*
Boss Stats:
Health: 2,880
New Game Plus: 5,270
Souls Dropped:
New Game: 40,000
New Game Plus: 120,000
Items Dropped:
Core of an Iron Golem
1 Humanity
Boss Attacks and Strategy:
The Iron Golem uses an Axe and his other hand as a club to smash the ground. He can combine the two to send a shockwave and stomp his feet if you stand under him for too long.
*Note you can summon Iron Tarkas*
For Melee users keep locked on to him and roll between his legs to dodge the attacks. Once he falls over, wail on him to kill him.
Mage’s need only to keep a distance and spam him with magic. Run through his legs as necessary.
Ornstein and Smough
Ornstein is the captain of the Four Knights of Gwyn. He was an honorary Dragon Slayer and fought with Artorias the Abysswalker, Lord’s Blade Ciaran, and Hawkeye Gough. He uses a Dragonslayer Spear and uses the power of lightning. Beside him fights Smough, the executioner for the royal family of Anor Londo, who praises the ground Gwyn walked on. Both were left to guard the cathedral in Anor Londo, and are required to beat to progress in the game as well as gain access to a covenant.
Boss Stats:
Health Ornstein (Normal/Super): 1642/2981
New Game Plus: 2873/5218
Health Smough: 2645/4094
New Game Plus: 4630/7166
Souls Dropped:
New Game: 50,000
New Game Plus: 150,000
Items Dropped:
Soul Of Ornstein
Soul of Smough
Leo Ring
Boss Strategy:
Ornstein attacks very fast and aggressively, using thrusts, leaps, lightning, and attacks nonstop. Smough is the opposite, hitting slowly and harder than his counterpart. He uses his hammer to swing, smash, jump, and charge his opponents. Whichever one you kill first will leave the other one supercharged, increasing their size, strength, and health. They also get new fancy moves when in super form. There are two ways to try and tackle this fight, and either way, you go summoning help will make this fight a lot easier. Ornstein and Smough can be one of the hardest fights in the game. Always keep your guard up and always keep both in your view. When fighting both, have a plan of who you want to kill first. Wait for an opening carefully to deal damage to one of them. If you decide to keep Ornstein alive, it is good to fight the ranged method by hiding behind pillars triggering him to spam his lightning attack. In between his attacks spam him with archery or magic. If you decide to keep Smough alive use the pillars to run around and attack him from behind. Lightning or Fire-based weapons do a lot of damage to him, such as the Lightning Spear, Lightning Uchigatana, Quelaag’s Furysword, or even pyromancy.

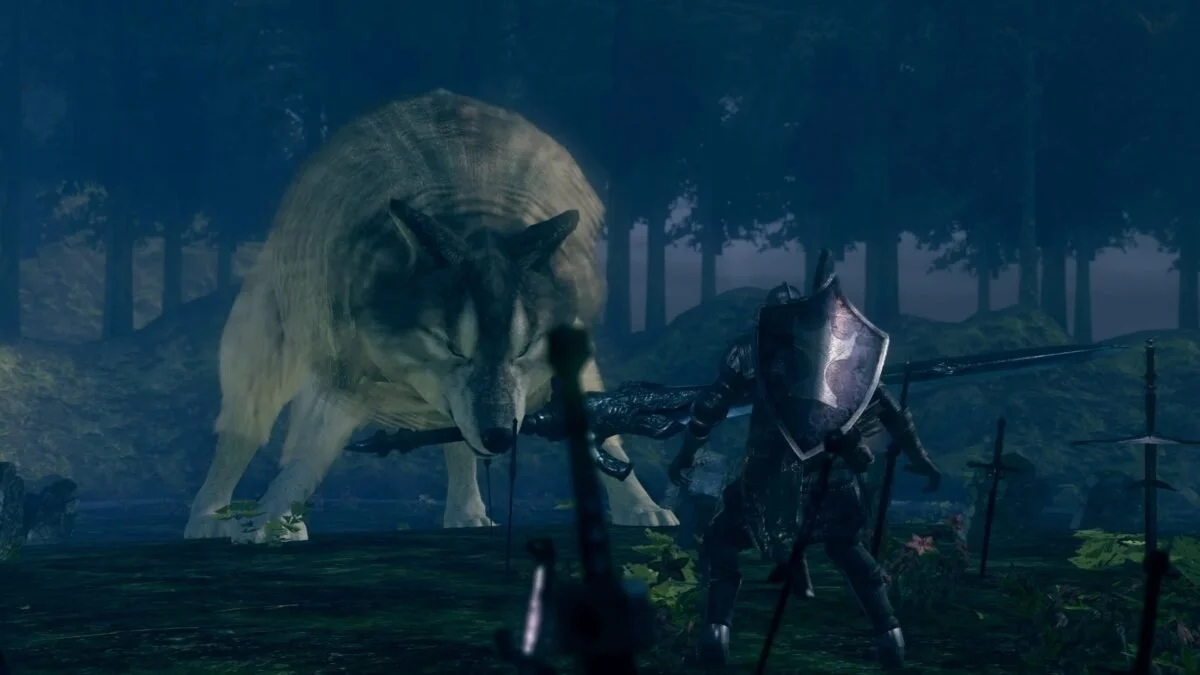
Great Grey Wolf Sif
Sif is a huge wolf that resides in a graveyard across from Darkroot Garden. Sif was Artorias the Abysswalker’s partner, and now protects Artorias’s grave. This fight is by far the saddest in the game and unfortunately required to progress.
Boss Stats:
Health: 3,432
New Game Plus: 5,800
Souls Dropped:
New Game: 40,000
New Game Plus: 120,000
Items Dropped:
Soul of Sif
Covenant of Artorias
1 Humanity
1 Homeward Bone
Boss Strategy:
The easiest method is to stay under her unless you are a ranged user. Staying underneath will cause Sif to miss all attacks, and once it finishes an attack, roll out and hit a few times then run back under. If you have poor stamina then try not to block too much, and focus on hitting the legs.
For Mage users always keep your shield up unless you are casting and time your casts. Stay as far away as possible and keep locked on. Use Soul Spear and Great Soul Arrow. Do not use Great Heavy Soul Arrow unless you want to get killed mid-cast.
The only way to cheese Sif is using a bow and climbing to the top of the rocks on the left. Equip feather arrows, Black Bow of Pharis, Tearstone Ring, and Hawk Ring.
Four Kings
These Kings are the remnants of the four leaders of New Londo Ruins, who were tempted with the art of lifedrain which led to their downfall. Killing them is necessary to gain the Dakrwraith Covenant, and move forward in the plot. They are located in the Abyss at the end of New Londo Ruins. Players must have the Covenant of Artorias Ring equipped to survive.
Boss Stats:
Health: 9,604
New Game Plus: 16,200
Souls Dropped:
New Game: 60,000
New Game Plus: 180,000
Items Dropped:
Bequeathed Lord Soul Shard
4 Humanity
Boss Attacks and Strategy
The Four Kings actually come in 5 wraiths and share a health bar. You start with one wraith and a new one appears every 45 seconds. Try to kill the first one before the next one appears if possible. They are one of the hardest bosses in new game plus.
They will grab you and deal a massive amount of damage, as well as steal 1 humanity from you.
*Note you can summon Witch Beatrice if you helped her against the Moonlight Butterfly.*
Try to stick to the sides of the Four Kings and dodge attacks rather than block to save stamina. Two handing your weapons is the best way to deal mass amounts of damage and fast. Try to have as must Estus as possible to heal when needed.
Melee: Wear light armor and use items like the Grass Crest Sheild, Cloranthy Ring, and Mask of the Child for stamina regeneration. Focus on timing your dodges correctly and hitting in between. Some attacks are extremely difficult to time at first, but practice makes perfect. Keep locked on as much as possible per King to take on one at a time if you can’t kill them before the next one appears.
Caster Strategy:
Equip Greater Magic Sheild Spell if possible. Homing Crystal Soulmass, Soul Spear, and Great Fireball or Great Chaos Fireball deal decent damage to the Four Kings. Focus on dodging attacks rather than blocking to save stamina, and pick off each Wraith before the next with strong spells like the ones listed. Using Grass Crest Shield will help with stamina regeneration.

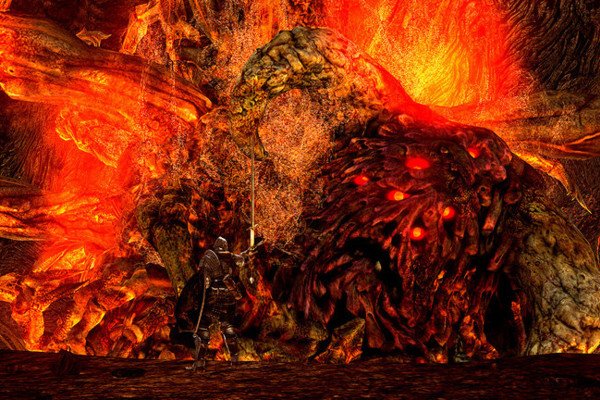
Ceaseless Discharge
Ceaseless discharge is required to literally cease the discharge of lava that prevents you from heading deeper into the Demon Ruins. It is a fire-based boss that is confirmed to be the brother of the daughters of chaos. He is passive until provoked by attacking or looting the Gold-Hemmed Black Set.
Boss Stats:
Health: 4,200
New Game Plus: 6,720
Souls Dropped:
20,000
40,000
Items Dropped:
1 Humanity
1 Homeward Bone
Boss Strategy
Ceaseless Discharge has an overhead attack where it slams one of its limbs into the ground. It can be easily dodged with a side roll. It will also sweep its limbs from side to side and knock you off the edge if you have little to no poise. Get close to it and roll.
It will begin spamming its limbs in the ground at random up to 10 times. Run behind cover immediately.
If you are too far from the boss it will slam a limb into the ground and stream fire at you.
There are a few different ways to beat this boss, and is not too difficult compared to other bosses you have to face.
The first method is to bait the boss back to the L-shaped hallway and down the stairs. When the boss starts its attack, run back up the stairs and wait for it to perform the attack. Once it starts run back down the stairs, wait for the smoke to clear, and attack. Rinse and repeat this method.
Another method is to head to the large rock where the armor set was located. Make a left and stop at the corner, waiting for Discharge to be around the stairs. As he spots you, let him attack and roll once. Then move into the first position and attack. Rinse and repeat this method. If he spews fire at you then you know you have the wrong position and need to experiment until it works.
You can also simply tank it and eat damage with the right build and miracles. You’ll be able to do this if you can survive the fire breath damage.
Archery is another method if you have few options. Equip gear that is strong in fire resistance and use the Flash Sweat Pyromancy. Run to the safe spot behind the giant boulder, run out and attack the tentacles with your bow and arrows, and run back behind to heal.
There is a cheese strategy for those who don’t want the challenge. Equip light armor, run in grab the gear, let him attack, and run back to the fog gate. Stop in the fog gate, let it jump over, and hang by one hand. A few attacks and it will plummet to its death.
*Note if you die en route that you will not be able to do this again*
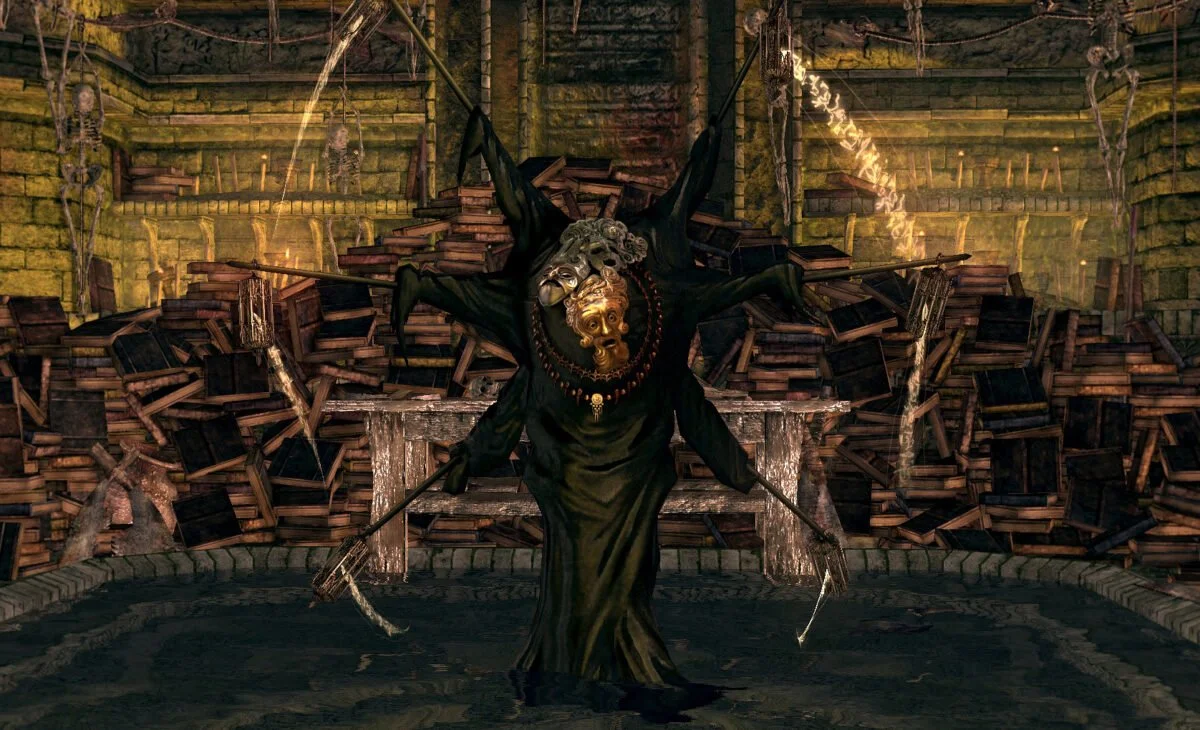
Bed of Chaos
Bed of Chaos is an extremely janky fight, to say the least. Bed of chaos was a failed experiment created by the Witch of Izalith. The Witch was originally trying to create the First Flame.
Boss Stats:
Health: 2
New Game Plus: 3
Souls Dropped:
New Game: 60,000
New Game Plus: 120,000
Items Dropped:
Lord’s Soul
1 Humanity
Boss Strategy:
While this boss is supposed to be easy in theory, it can actually be a horrible pain. This boss acts as a puzzle boss, for you need to attack its glowing roots on each side. There are 2 in the new game, but new game plus there are 3. Unfortunately, you have to dodge its crazy attacks with weird hitboxes. Bed of Chaos will also break random parts of the floor making it awkward to avoid his hits with one linear path available to get to each side. If you kill one root and die, the room will remain as you left it when you return. So try to not die at all to make your life easier. The Bed of Chaos will have a variety of attacks such as the scythe, fireballs, and firestorms. It does not matter which side you start at, but rushing will not help so patience is key. Be mindful of the floor and its attacks. If you have ranged ability, that makes the fight 10 times easier seeing as you just have to aim at the roots from afar. This is the best possible solution if you want to avoid stress completely.

Seath the Scaleless
Seath is a dragon that betrayed his own kind and brought them to extinction with Gravelord Nito, Gwynn, and the Witch. He was anointed the title of Duke by Gwyn and created his own Grand Archive to continue his research. His research granted him immortality thanks to his Primordial Crystal at the cost of his sanity. He eventually locks himself away into the Archives in fear of those stealing his secrets.
Boss Stats:
Health: 5,525
New Game Plus: 8,674
Souls Dropped:
New Game: 60,000
New Game Plus: 120,000
Items Dropped:
Bequeathed Lord Soul Shard
1 Humanity
Moonlight Greatsword (Must attack the tail)
Boss Strategy:
Players will encounter Seath twice while in the archives. You will need to die to progress in the game and will wake up in a cell. The second attempt will be the actual fight in the Crystal Cave. Seath will use many powerful attacks between his crystal breath and explosions, as well as his melee attacks with his tail. Once you enter the room, wait for him to move to the middle and then move in. Make sure you do not kill the crystal too early and try to keep to his sides as you attack. Magical attacks deal a lot of damage and stay out of his range when he uses his breath attack. For mages, using Great Chaos Fireball or Crystal Soul Spear are strong attacks against Seath. Heal when beside him as needed.

Pinwheel
Pinwheel is a base that lies deep within the Catacombs and comes before the Tomb of the Giants that leads to Gravelord Nito.
Boss Stats:
Health: 1,326
New Game Plus: 2,691
Souls Dropped:
New Game: 15,000
New Game Plus: 25,000
Items Dropped:
Rite of Kindling
1 Humanity
One of the three masks: Mask of the Father, Mask of the Mother, or Mask of the Child
Boss Strategy:
Pinwheel is not super difficult and uses a variety of fire-based attacks and his servants to kill you. The trick is to mainly focus him, but keep a couple of servants alive so he does not clone himself. Use fire-resistant gear to help with damage, but overall he should not take long to kill. When he drops to 30 percent he will run away and leave summon up to 8 clones, kill them and he will remain the rest of the fight. He is also weak against pyromancy.
*Note you can summon Paladin Leeroy if you need to, but he is not necessary given how easy the boss is.*
Gravelord Nito
Gravelord Nito was one of the lords to fight against the dragons. He is the ruler of the catacombs and is known as the Lord of Death. He overs the covenant prior to his fight as long as you follow the correct method to unlock it.
Boss Stats:
Health: 4,317
New Game Plus: 7,076
Souls Dropped:
New Game: 60,000
New Game Plus: 120,000
Items Dropped:
Soul of Gravelord Nito
1 Humanity
Boss Strategy:
Nito is not too hard of a fight but can be annoying if you don’t know what to do. His skeleton servants will constantly come at you aiding Nito in the fight. He has a toxic sword and sends a dark wave that fills your toxic meter. He can also grab you and deal a lot of damage. The trick is to not lead out Nito by keeping distance or he will summon more skeletons. Keep close and try to use a divine weapon. Stay to his sides to avoid being grabbed if possible. Try to wear high poise armor to avoid knockbacks and interruptions and let Nito kill off his skeletons with his death wave. For ranged and magic users when you drop into the fight stay put and hit him from where you stand. Wear the Ring of Fog and the Slumbering Dragoncrest Ring. He will not provoke the other skeletons and slowly come towards you allowing you to pelt him from afar.

Gwyn Lord of Cinder
Gwyn, Lord of Parry, is one of the great gods and the Lord of Sunlight. He led the effort to end the Age of Ancients with Gravelord Nito, the Witch of Izalith, and Seath the Scaleless. He oversaw the Age of Fire and sacrificed himself to link the First Flame a thousand years prior to the start of the game. This boss is rather easy if you know how to parry, otherwise, I suggest you get some practice in.
Boss Stats:
Health: 4,250
New Game Plus: 6,745
Souls Dropped:
New Game: 70,000
New Game Plus: 140,000
Items Dropped:
Soul of Gwyn, Lord of Cinder
Boss Attacks and Strategy
Gwyn is an extremely aggressive boss, and it can be hard to predict what attacks he will use. He uses a variety of slashes with his sword, a thrust attack, a kick to knock you down, and a grab attack. While these attacks do a lot of damage and can feel overwhelming, Gwyn is easily parried. The easiest method is to use Iron Flesh and wear Havel’s Set. You can also use the Dragon Greatsword to stagger him. Just keep using estus when needed, parry, and attack.
*Note Solaire of Astora can be summoned if he survived the Izalith incident*
Mages need only to keep dodging his attacks and use Homing Soulmass or Homing Crystal Soulmass. He can easily dodge Soul Spears and Arrows and will dive at you if you put in too much distance.

Optional Bosses
These are optional bosses, but I recommend trying to beat them all for important items and easy access to places.
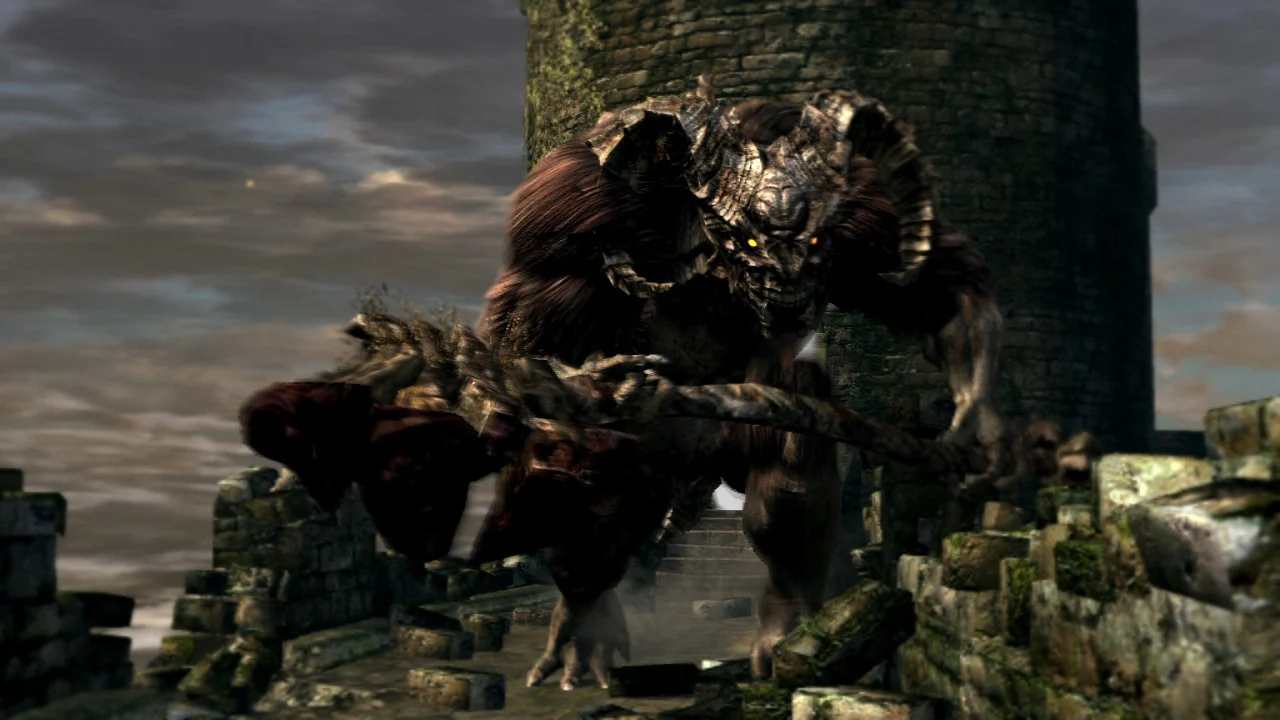
Taurus Demon
This boss is the next optional boss, yet also on the way toward the next area. It blocks the bridge in the Undead Burg which leads to the Undead Parish. This boss is extremely easy to kill.
Boss Stats:
Health: 1,215
New Game Plus: 3,162
Souls Dropped:
New Game: 3,000
New Game Plus: 15,000
Items Dropped:
1 Humanity
1 Homeward Bone
Demon’s Greataxe (possible drop)
This Demon is very easy to kill if you’re quick. He will attack with a Greataxe with swift slashes and jump attacks. He is also weak to lightning damage so gold pine resin will help melee users. The best way to kill him, since he is as wide as the bridge, is to run out to trigger him, run back to the ladder next to the entrance, climb it and jump down while attacking when he is in range. If you wait too long he will jump up with you so you must be quick. Repeat until he dies.
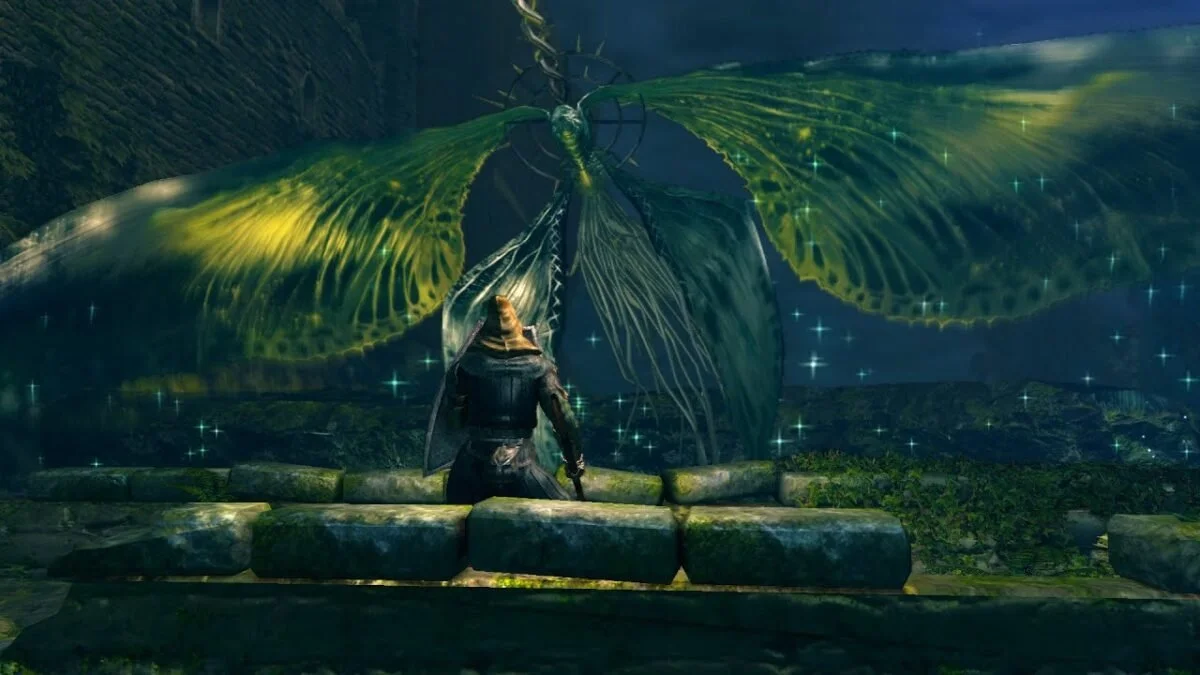
Moonlight Butterfly
*Right After Bell Gargoyles*
This boss is not hard but very annoying because it’s a ranged fight only. It can be found in the Darkroot Garden.
Boss Stats:
Health: 1,255
New Game Plus: 11,970
Souls Dropped:
New Game: 10,000
New Game Plus: 40,000
Items Dropped:
1 Humanity
Soul of a Moonlight Butterfly
Blue Titanite Chunk (1 10%, 2 .3%, Slab .2% chance)
Boss Strategy:
The Moonlight Butterfly has a variety of magic attacks, such as a ray beam, energy orbs, and bombs. The only time you can do melee damage is when it lands to rest which is a short period of time. Dodging the attacks is easy, but the fight will go faster if you have any ranged abilities or weapons.
*Note Witch Beatrice can be summoned for the fight*
Capra Demon
*After the Bell Gargoyles*
This is an optional area boss in the Lower Undead Burg. He is reachable in two ways, going through the shortcut in the waterway or going down to the end of main street. He is weak to fire and honestly beaten by what feels like luck.
Boss Stats:
Health: 1,176
New Game Plus: 2,940
Souls Dropped:
New Game: 6,000
New Game Plus: 30,000
Items Dropped:
Key to Depths
1 Humanity
1 Homeward Bone
Demon Great Machete (rare drop)
Boss Strategy:
This boss is a hard hitter with his machete and will swing and slash away at his opponents. The dogs, however, are the worst part of the fight. The Capra Demon is assisted by 2 dogs that immediately charge at you as you enter. If they manage to stagger you, the Demon will follow up and can deal a lethal blow. Summoning help goes a long way, and using heavy weapons can help stagger the enemy. Using Iron Flesh will also help prevent damage. As you enter, immediately roll to the right or it is game over. Run up the stairs on the left side to lure the dogs and try to pick them off before the boss gets there. You must kill them if you want to win. After the dogs fail you can lure the Demon up the stairs and knock him off as needed. You can also try to run on top of the shelf like a ledge and drop down on him to deal a good amount of damage. Otherwise, just pay attention to his attacks and hit when safe. It is a lot more tolerable after the dogs are dead.

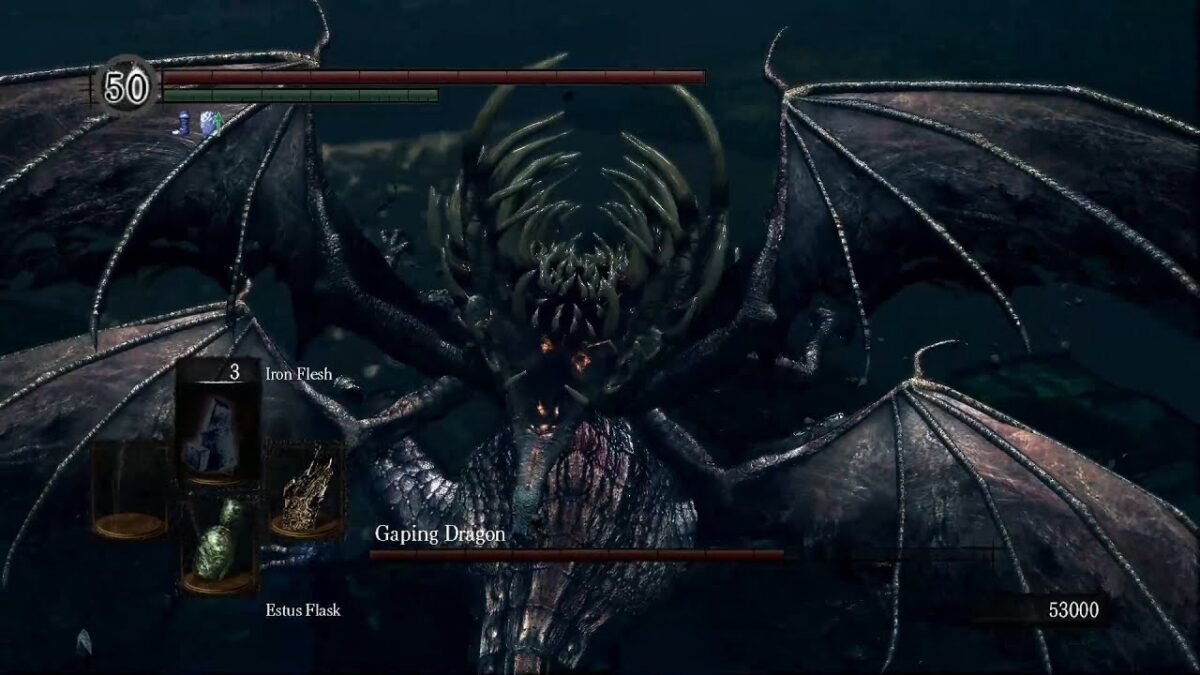
Gaping Dragon
*After Iron Golem in Anor Londo Painted World of Ariamis*
She is an optional fight in Dark Souls, and you can actually choose to walk by her after talking and return to Anor Londo. If you do fight her, she can turn invisible and use a deadly scythe. She is the only Dragon crossbreed in Lordran and it is hinted that her father is Seath the Scaleless. Note that attacking her is considered a sin.
Boss Stats:
Health: 2,300
New Game Plus: 3,6111
Souls Dropped:
New Game: 30,000
New Game Plus: 60,000
Items Dropped:
Soul of Priscilla
1 Twin Humanity
Priscilla’s Dagger (cut off tail)
Priscilla turns invisible in addition to her blizzard and scythe attacks. Her Blizzard attacks deal bleed damage and she has wide range swings. She is fairly easy as long as you know to look for her footprints when she is invisible and keep your shield up. When she is invisible try not to spam attacks or you will get punished, instead hit, and dodge. Try to equip bleed-resistant equipment like the Bloodbite ring. Pyromancy is good here such as the Great Chaos Fireball for when she goes invisible as well.
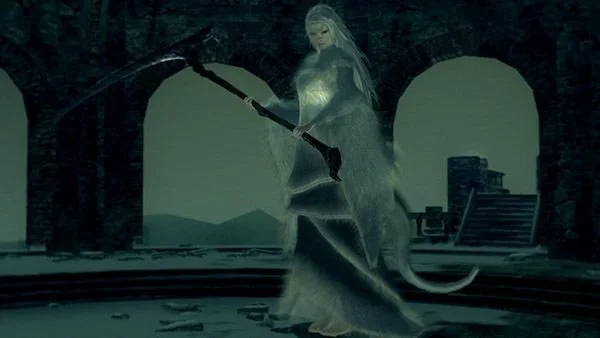
Crossbreed Priscilla
*After Iron Golem in Anor Londo Painted World of Ariamis*
She is an optional fight in Dark Souls, and you can actually choose to walk by her after talking and return to Anor Londo. If you do fight her, she can turn invisible and use a deadly scythe. She is the only Dragon crossbreed in Lordran and it is hinted that her father is Seath the Scaleless. Note that attacking her is considered a sin.
Boss Stats:
Health: 2,300
New Game Plus: 3,6111
Souls Dropped:
New Game: 30,000
New Game Plus: 60,000
Items Dropped:
Soul of Priscilla
1 Twin Humanity
Priscilla’s Dagger (cut off tail)
Priscilla turns invisible in addition to her blizzard and scythe attacks. Her Blizzard attacks deal bleed damage and she has wide range swings. She is fairly easy as long as you know to look for her footprints when she is invisible and keep your shield up. When she is invisible try not to spam attacks or you will get punished, instead hit, and dodge. Try to equip bleed-resistant equipment like the Bloodbite ring. Pyromancy is good here such as the Great Chaos Fireball for when she goes invisible as well.
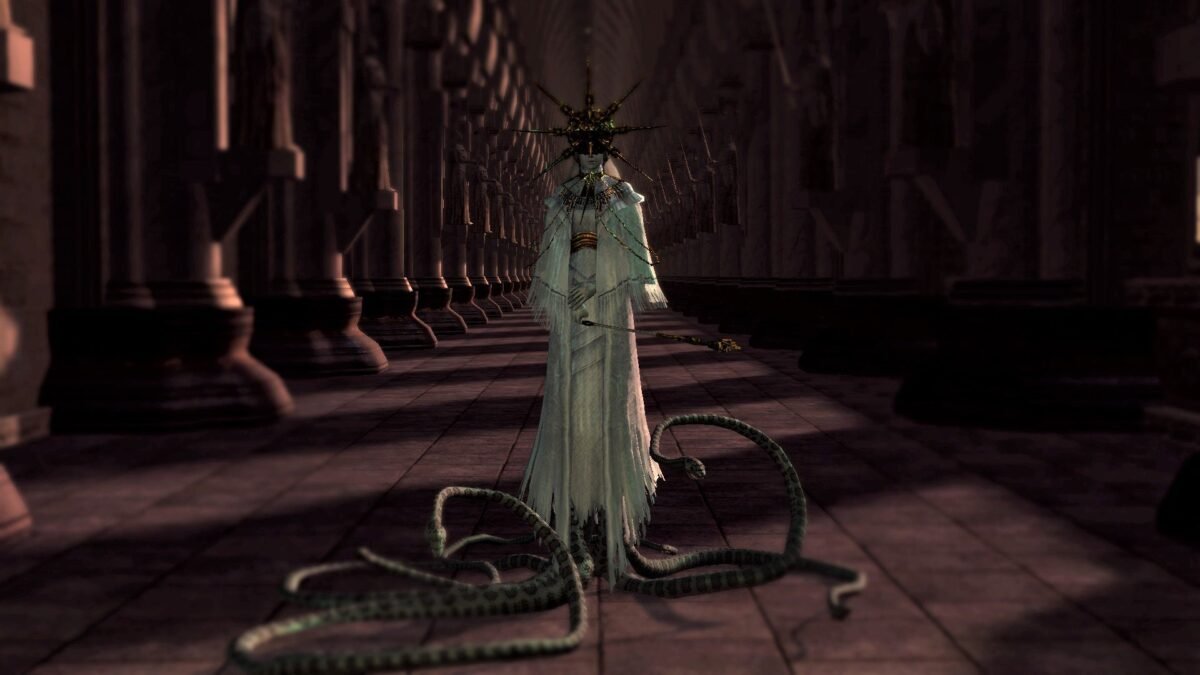
Dark Sun Gwyndolin
*After Ornstein and Smough*
Dark Sun Gwyndolin is another optional boss, but if killed will prevent you from the covenant and benefits. He is the last born of Gwyn, and leader of the Blade of the Dark Moon covenant. He is also the last remaining deity in Anor Londo and created the illusion of his sister Gwynevere. Angering him is considered a sin.
Boss Stats:
Health: 2,000
New Game Plus: 6,000
Souls Dropped:
New Game: 40,000
New Game Plus: 120,000
Items Dropped:
Soul of Gwyndolin
Brass Armor Set (end of the hallway)
Sunlight Blade Miracle (end of the hallway)
Boss Strategy:
A high magical resistant shield is key to getting close. Crest Shield is a great option to use to block Gwyndolin’s magic attacks. He will be at the end of the hallway as you enter and pelt you with ranged magical attacks. Moving in fast and close is a must if you want to get in a few hits before he teleports. Wear light armor and stamina recovery gear. If you use archery it is best to hang back and avoid his attacks as you pelt him with arrows. Magic is hard due to the fact you can hardly lock on, so try to stay up close to him.
*Note if you kill him you will also piss of the firekeeper*
Stray Demon
*After Ornstein and Smough and Gwyndolin*
Player must return to Northern Undead Asylum. He is located below the Asylum Demon’s arena. He is also worth killing due to the titanite slab drop.
Boss Stats:
Health: 5,250
New Game Plus: 8,242
Souls Dropped:
New Game: 20,000
New Game Plus: 40,000
Items Dropped:
Titanite Slab
1 Humanity
1 Homeward Bone
Boss Strategy:
The Stray Demon uses a ton of hard-hitting melee attacks with staff, such as a sweeping strike and ground pound. He also has some hits that will deal damage when blocked known as redwing attacks. Due to his large amount of health, it is wise to revisit the Asylum bonfire. The key here is to attack from behind with a couple of hits and then back away to dodge, rinse and repeat this method. He is vulnerable to bleed damage for melee users. Pyromancers should use Iron Flesh and hack away due to his lack of mobility.
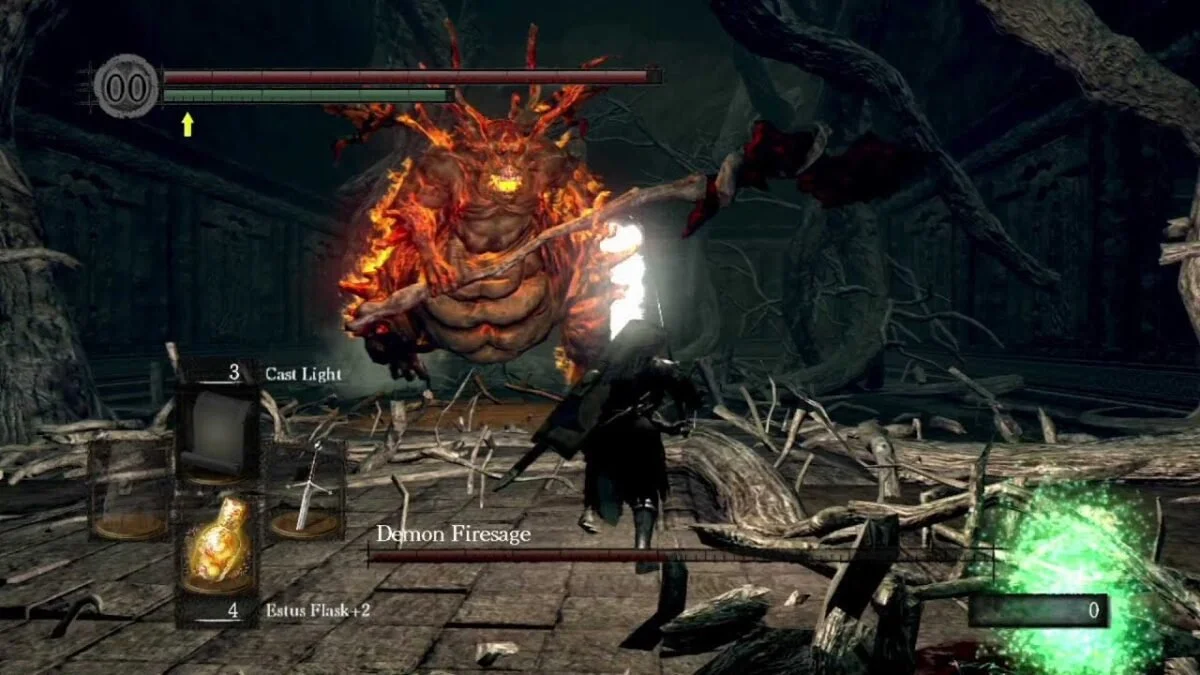
Demon Fire Sage
*After Ceaseless Discharge*
Demon Firesage is found at the end of the Demon Ruins.
Boss Stats:
Health: 5,950
New Game Plus: 8,791
Souls Dropped:
New Game: 20,000
New Game Plus: 40,000
Items Dropped:
Demon’s Catalyst
1 Humanity
Boss Strategy:
The Fire Sage is a faster version of a stray demon, with bonus fire attacks. He will lunge and strike with some magic attacks but is not hard to kill off. He is vulnerable to magic, making Mage the ideal counter for him. Dodging and blocking, paired with Homing Soul Mass and Soul Spears can easily take care of our giant firey friend. Otherwise, our tank builds can block and eat damage with the right shield, and our melee counterparts need stamina-friendly gear paired with Iron Flesh. The Demon Fire Sage is also vulnerable to bleed damage for fast-paced melee build users.
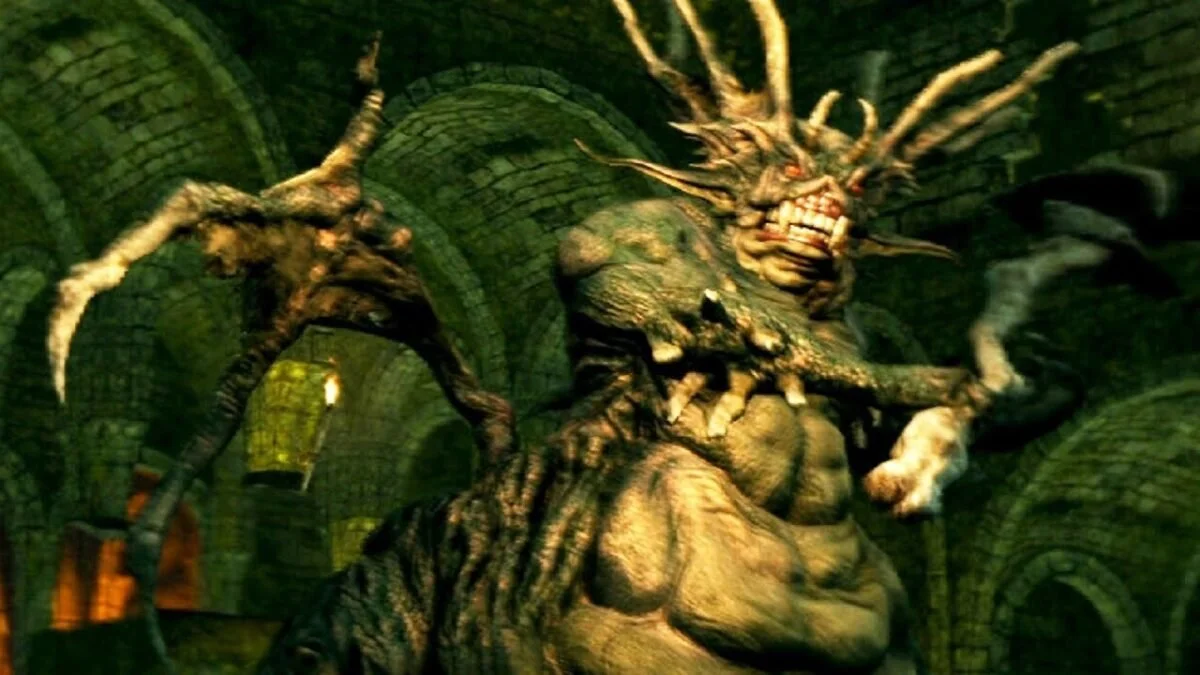
Centipede Demon
*After Ceaseless Discharge*
The Centipede Demon is optional, but killing it will make your life easier seeing as it defends the path to Lost Izalith. This boss stands on the lava and his attacks can be annoying for those without the Orange Charred Ring.
Boss Stats:
Health: 3,432
New Game Plus: 5,941
Souls Dropped:
New Game: 40,000
New Game Plus: 80,000
Items Dropped:
Orange Charred Ring
1 Humanity
1 Homeward Bone
Boss Strategy:
This Demon is not terribly difficult if you know what to do and have the Orange Charred Ring. He will attack you with his body and tail swings, as well as a deadly grab and lava blasts.
*Note Solair is a summon for this fight if you have followed his story*
Make sure you run immediately through the lava to the island on the right side of the area. This gives you more room to fight him so you won’t be stuck in the lava. Try to stay under him and cut off his tail first to weaken him. Pay attention when his health gets low to avoid his AOE. If you manage to hack off the tail at all he will start to run into walls and go crazy so be mindful.

Mini Bosses
These are the mini-bosses of Dark Souls. They are optional and usually block items or areas that you need to get to.
Havel the Rock
Havel is a mini-boss located are the bottom of the spiral staircase in the Undead Burg. He carries the heavy Havel Set armor and Great Shield with a massive dragon’s tooth hammer. He deals deadly blows and massive damage and is relentless in chasing players far distances.
Boss Stats:
Health: 1,000
New Game Plus: 1,600
Souls Dropped:
New Game: 3,000
New Game Plus: 6,000
Items Dropped:
Havel’s Ring
Boss Strategy:
Havel hits hard and takes a while to kill due to his armor. To the player’s advantage, he is extremely slow and easy to backstab. You can easily dodge his attacks and land backstabs by rolling away when he telegraphs his swings. It’s easier to take your armor off for the additional speed since he can one-shot you regardless of what you put on. Pyromancers, sorcerers, and ranged users can easily bait him up the stair case and continuously hit him.

Hellkite Wyvern
The Hellkite Wyvern is perched upon the Bridge in the Undead Burg after you fight the Taurus Demon. He rains fire down on the bridge as you cross, so run as fast as you can to the middle where the stairs lead down.
Boss Stats:
Health: 2,208
Souls Dropped:
New Game: 10,000
New Game Plus: 50,000
Items Dropped:
Drake Sword (if you cut off the tail)
You can either cheese the boss by using a ranged weapon or magic from below the bridge and aim at the head, or you can provoke it with a bow and wait for it to land to use melee damage. You will need a strong enough weapon and need to watch out when he goes back into the air. He is immune to fire so pyromancy and fire-based weapons will not help here.

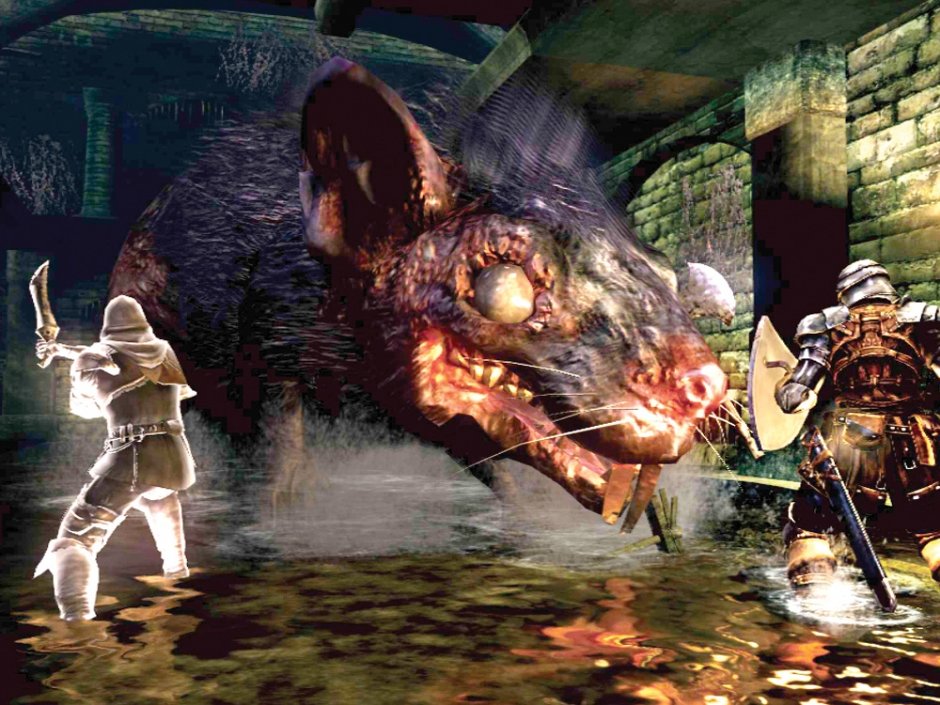
Giant Rat
The Giant Rat is located in the first antechamber of the Depths. It guards the Sewer Chamber Key as well as the one shortcut to Blighttown.
Boss Stats:
Health: 693
New Game Plus: 1,690
Souls Dropped:
New Game: 1,000
New Game Plus: 5,000
Items Dropped:
1 Humanity
Boss Strategy:
This Rat will bite, scratch, and hit you for poison damage. It is extremely fast and hits for hard damage. There is no real strategy other than to wear some poison-resistant gear if possible and wail on it. The rat is weak to fire damage so pyromancy or resin will help kill it faster. Ranged and Magic players can head back to the Butcher’s kitchen and find behind her table. If you drop down you will land on a ledge above the rat and can pelt it from a safe area.
Butcher
The Butchers are found in the Depths Kitchen. They are guarding a room that contains Laurentius, who is trapped and needs help to escape.
Boss Stats:
Health: 671
New Game Plus: 1,639
Souls Dropped:
New Game: 1,000
New Game Plus: 5,000
Items Dropped:
Sack
Boss Strategy:
The Butchers come in a pair and will run at you, pin you, and swing at you with their cleavers. For melee users, it’s simple as long as you aren’t pinned. You need to stay behind them and avoid their heavy hits. Range users and magic users can snipe them from the balcony. Make sure you take out the attack dog first.

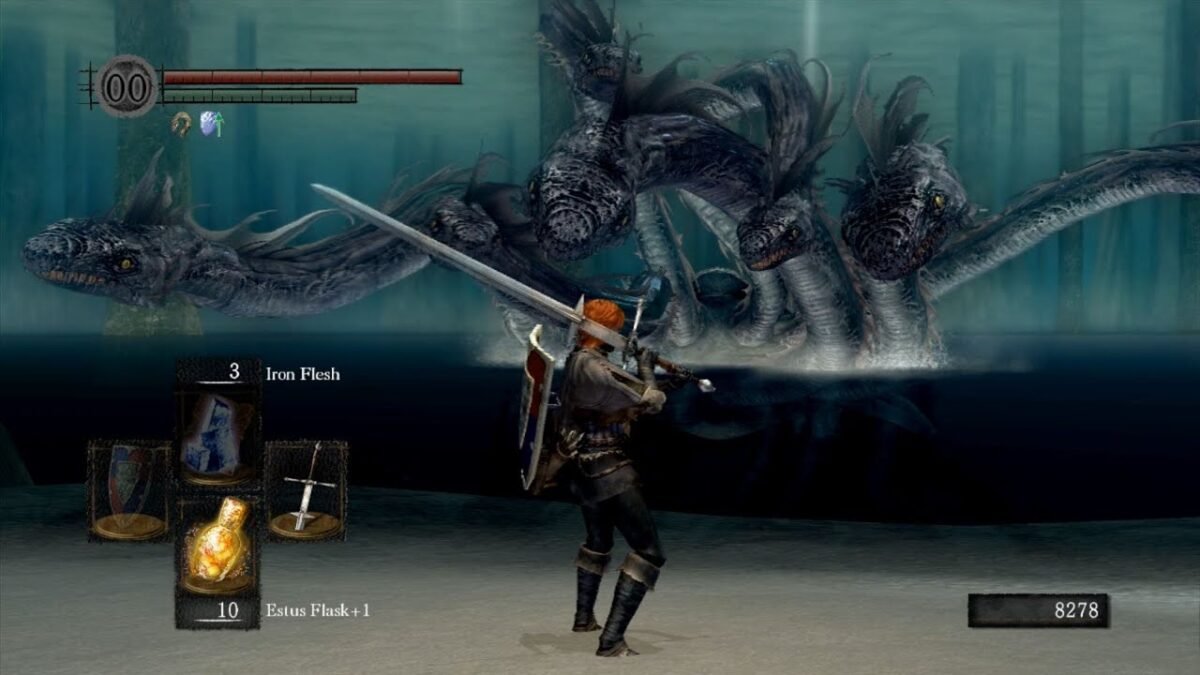
Black Hydra
This Hydra is a buffed-up version of the Hydra in Darkroot Basin. It has the same attacks, but more HP and harasses you throughout Ash Lake.
Boss Stats:
Health: 3,864
New Game Plus: 6,336
Souls Dropped:
New Game: 10,000
New Game Plus: 20,000
Items Dropped:
x2 Dragon Scales
Boss Strategy:
Each head of the Black Hydra spits out water projectiles that travel a massive distance. Aside from this, it will do normal melee damage with its heads. The water projectiles also do normal melee damage. In order to beat the hydra you need to enter the shallow water, but be wary for you can drop off and die if there is no ground. Each head will slowly strike a shallow area in which you need to attack them. It only takes a few hits to kill each head. Be careful traveling to where each head lands so you don’t drop off as previously mentioned. Once all the heads are killed the Hydra will die. For ranged it’s a lot easier for you just need to attack the two heads in the middle first and pick off the rest.
Expansion Bosses
These are the main area bosses of the Artorias of the Abyss DLC.
Sanctuary Guardian
This is the first DLC boss of the game and is a huge Manticore that guards entry to the Oolacile Sanctuary.
Boss Stats:
Health: 2,560
New Game Plus: 4,019
Souls Dropped:
New Game: 30,000
New Game Plus: 60,000
Items Dropped:
Guardian Tail (if cut off)
Guardian Soul
1 Humanity
Boss Strategy:
The Guardian has a lot of melee and aerial attacks mixed with lightning. It will send shockwaves and poison tail attacks and shoot balls of lightning at players. A shield with decent lightning and physical resistance is recommended like the Silver and Dark Knight Shields. Keep the armor light and use a heavy strong weapon if you want to hack off the tail. Physical attacks are easily dodged by moving backward while with lightning-based attacks you want to roll to the sides.

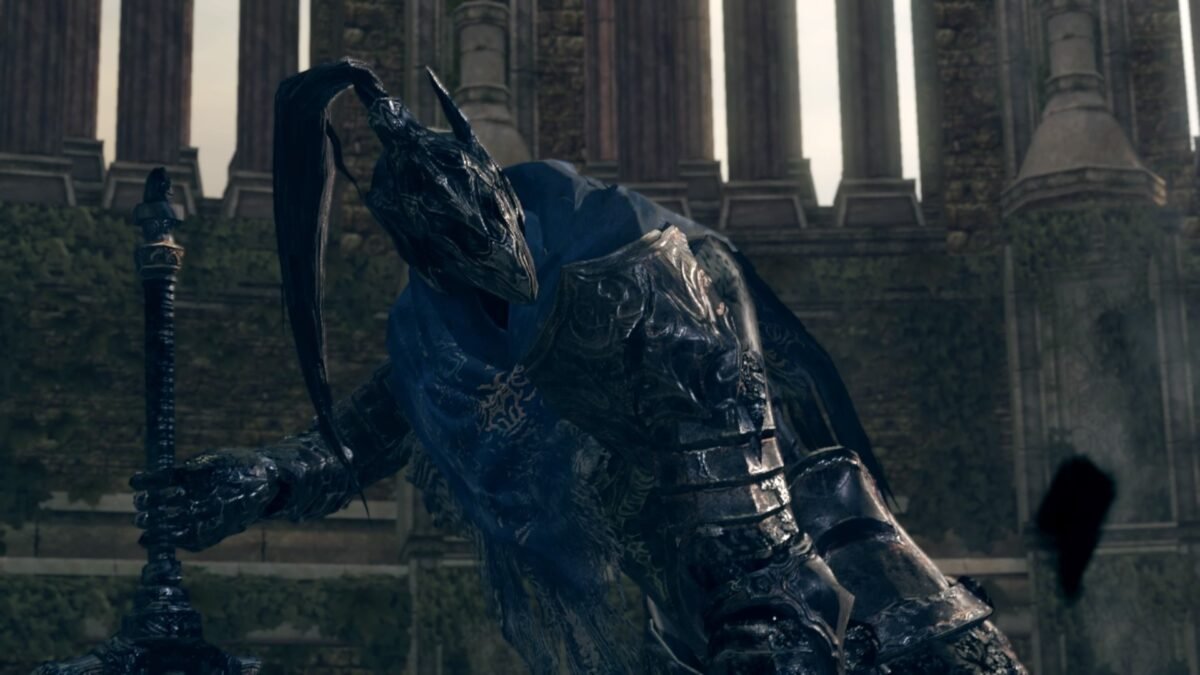
Artorias the Abysswalker
Artorias is one of the fallen Four Knights of Gwyn and commanded Gwyn’s army. He sacrificed himself to save Sif from Manus and became corrupted by the Abyss.
Boss Stats:
Health: 3,750
New Game Plus: 5,887
Souls Dropped:
New Game: 50,000
New Game Plus: 100,000
Items Dropped:
Soul of Artorias
Boss Strategy:
Artorias is no joke, with crazy combos and great damage. He is fast and uses his sword with leaping strikes, dodging attacks, a 2 hit hurricane swing, and being near him alone he can attack you with darkness and weird sludge. Players will constantly be on the defensive and will have to time their hits sparingly. It is highly recommended to summon help, otherwise, you will have a difficult time unless you run a pyromancy build. Melee users will need to pay attention and dodge the attacks before landing 2-3 hits and repeating. Pyromancers should have their flame maxed out and use Great Chaos Fireball and Great Fireball as spells. Wear Crown of Dusk to boost pyromancy and gear to help with stamina. Try to stagger him out of his backflip by quickly using a Great Fireball to wrack up some damage.
Black Dragon Kalameet
Kalameet is one of the last surviving Ancient Dragons and is known as the Bringer of Calamity. Hawkeye Gough request’s your help in ending the mighty dragon.
Boss Stats:
Health: 5,400
New Game Plus: 8,478
Souls Dropped:
New Game: 60,000
New Game Plus: 120,000
Items Dropped:
Calamity Ring
Obsidian Greatsword (if tail severed)
Boss Strategy:
Once again it is recommended to summon help. He is tough and constantly on the move. He has an arsenal of attacks from sweeping his tail, snapping his jaw, leaping, stamping, and various fire attacks. He will charge you, breathe fire across the valley, breath fire at you from right to left, and stun you with fire attacks leaving you at death’s door. Wearing magic-resistant gear is a must as well as having 20 estus flasks in your arsenal. Crossbows are effective for range users and bring green blossoms for stamina recovery due to having to block a lot. Melee players will have to memorize and try to time their attacks, but sometimes he can be unpredictable. Rushing this fight will most surely kill you. Magic users will have a slightly easier time and should wear the Bellowing Dragoncrest Ring to maximize spell usage, and bring Crystal Soul Spear and Soul Spear for the fight.

Manus, Father of the Abyss
Manus is the final boss of the expansion and the Father of the Abyss. He was once human, but his humanity went wild with an unknown cause. There is speculation from Hawkeye Gough that either Kaathe or Frampt led the citizens of Olacile to travel into the Abyss.
Boss Stats:
Health: 6,665
New Game Plus: 10,464
Souls Dropped:
New Game: 60,000
New Game Plus: 120,000
Items Dropped:
10 Humanity
Soul of Manus
Boss Strategy:
*Note if you saved Sif in the area before the boss room, he can be summoned for the fight*
Manus uses a variety of melee combos and hits such as Hand Slam and a close-ranged spin attack. He also rains dark magic homing missiles and dark waves are players. Wearing a Silver Pendant will block all dark magic and is a must for this fight. Melee users should bring a green blossom or stamina recovery gear and stick close to Manus. Great Sheild of Artorias is useful to block his attacks and with the leftover stamina land a few blows. Be mindful of your stamina because one combo can kill your bar. Ranged users can fight Manus with the right build and a strong enough bow, but will find themselves with less openings and dodging more.